Ice Cream Nails

Monday, November 26, 2012

Hola amigos!

I have another yummy treat for you today! Ice Cream Nails.  I love China Glaze It's A Trap-eze so much that I just had to make another delicious mani!

What I used:

1.  Essie Splash of Grenadine
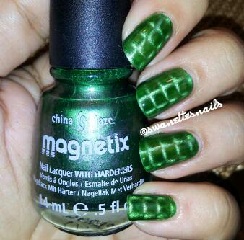
2.  China Glaze It's A Trapeze
3.  KD7 Stamping Plate
4.  Sinful Colors Snow Me white
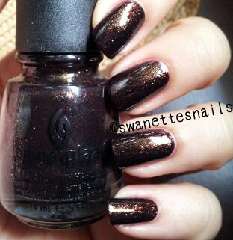
5.  China Glaze Mahogany Magic

Steps:

1.  Apply Essie Splash of Grenadine to all your nails.  Let them completely dry.
2.  On the stamping plate use China Glaze Mahogany Magic for the cone part and Sinful Colors Snow Me white on the Ice Cream top.  Then wipe and apply on nails with stamper.  Repeat on all nails.
3.   Now we will fill up Ice Cream with China Glaze It's A Trapeze using a dotting tool.
4.  Let nails dry and apply your favorite top coat!

Enjoy :)

China Glaze Bohemian Luster Chrome Collection

Hola!

Here I have some simple nail stamping mani's using China Glaze Bohemian Luster Chrome Collection 2012.  These are six gorgeous duo-chrome polishes that where release Fall 2012. 

1.  Unpredictable:
Cheeky plate 46 and Rimmel Black Satin.


2.  Want My Bawd:
Bundle Monster plate 04 and Essie Penny Talk.


3.  Rare & Radiant:
Mash plate 43 and Rimmel Black Satin.


4.  Swanky Silk:
Cheeky plate 46 and Finger Paint Plum Startled.


5.  No Plain Jane:
Bundle Monster 211 and Essie Penny Talk.


6.  Defiantly Daring:
Bundle Monster 210 and Rimmel Black Satin. 


Enjoy :)


China Glaze Cirque du Soleil Haul

Hola mis amigos! Como estan?  How are you doing?

After stalking my local Sally Beauty Supply for a long time, they finally received The China Glaze Cirque du Soleil Collection... Yay!  I bought six polishes from the collection. 


(from left to right:  Get Carried Away, Running in Circles, Water you waiting for, Creative Fantasy, Whirled Away and It's a Trap-eze)


1.  Get Carried Away


I applied Get Carried Away over Rimmel Black Satin.  The Application was quite difficult to apply because it was thick and goopy.  Maybe some thinner will do the trick and make it better to apply.   Its a was too sheer for me to wear on its own, so I applied it over black. In my opinion the result is better than wearing the polish on its own.

2.  Running In Circles


What a beautiful green! The application was fabulous.  I only used two coats.   Here I used Bundle Monster 320 plate and Rimmel Black Satin Polish.

3.  Water You Waiting For

Here is another beauty from this collection. I used Bundle Monster 323 plate and Essie No place like Chrome on my ring finger.

4.  Whirled Away


I love this one even if its hard to get these glitter on my nails.  I will make it work! It seems like this nail polish needs more glitter especially the white hexes.  I had to use a dotting tool to pick up the white hexes and apply them to my nails. 

5.  It's A Trap-eze
                                         

This is my favorite from all the six I purchase! Love it! It makes me happy just looking at it! It was easy to apply.  Doesn't it look yummy? It reminds me of cupcakes or ice cream with sprinkles.  

6.  Creative Fantasy


For some odd reason my camera isn't picking up its true color but you can also see it on my Yummy Cupcake Mani I posted before.  It is a bright purple and dries a semi matte.  I applied four coats and it is still sheer.  Here I used Red Angel plate 114, Sinful Colors Snow me White on my ring finger and Seche Vite.


I definitely Love these Colors!  I am so happy that China Glaze release this collection! Its so colorful and fun! What do you think of China Glaze Cirque du Soleil Collection?


Yummy Cupcake Mani

Wednesday, November 21, 2012

Hola mis amigos!!

Tomorrow is Thanksgiving! So I know many of you are preparing for tomorrow family meal, and many are making yummy deserts like pumpkin pie, banana bread, or even Carrot Cake like my Mom does.  Here I present to you this yummy mani!  It sure does make me hungry! lol  :)


Yummy Cupcake Mani

Ingredients:

1.  China Glaze It's A Trap-eze!
2.  China Glaze Creative Fantasy
3.  Bundle Monster Plate 307
4.  Sinful Colors Snow Me White
5.  Zoya Pippa
6.  China Glaze Gaga 4 Green
7.  China Glaze Dance Baby
8.  Sally Hansen Xtreme wear 07 Cherry Red

Procedure:

1.  First apply your favorite base coat.
2.  Then apply China Glaze Its A Trapeze on your thumb, middle finger and ring finger.
3.  Also apply China Glaze Creative Fantasy on your index finger and pinky.
4.  Let it completely dry before stamping.
5.  Now we stamp on our index finger and pinky using Bundle Monster plate 307 and Sinful Colors Snow Me White.  This image has stars, dots and a huge cupcake that we are going to fill in with color using a small detail brush and dotting tool.
6. Using your dotting tool paint dots with different colors I used China Glaze Gaga 4 Green, China Glaze Dance Baby and Zoya Pippa.
7.  Now with a detail brush you fill in the cupcake base with different colors I mention in #6.
8.  For the cupcake topping I used China Glaze Its A Trapeze.
9.  Then add a cherry using Sally Hansen Cherry Red. 
10.  Let your nails dry before finishing with your favorite Top Coat.  

Enjoy! :)


Golden Butterfies


Hola amigos! :)

I hope you are having a wonderful day!

Golden Butterflies Recipe:

Ingredients: 

1.  O.P.I Are We There Yet
2.  Bundle Monster Plate 307
3.  Essie Good as Gold
4.  Sation Nail Lacquer Track Starlet

Procedure:

1.  Painted all your nails with OPI Are We There Yet.
2.  Let it completely dry.
3.  Then stamp your middle finger, ring finger and thumb with Essie Good as Gold and Bundle Monster plate 307.
4.  Add glitter to the tips of your index finger and ring finger for some bling.
5.  Take the large hex glitters from the Sation Track Starlet nail lacquer and add them in between the butterflies for some more sparkle.
6.  Apply your favorite Top Coat!

Enjoy ;)

Blast From The Past #1: China Glaze Metro Collection 2011

Hola amigos!

Introducing Blast From The Past.  In blast from the past I will posting some old collections.  Here are the swatches of all 12 nail polishes from the China Glaze Metro Collection that was release last year during fall 2011.  I have done very simple manicures for some of the shades and others I just left alone because they where beautiful as is.  Believe me they are much better in person.  Enjoy :)

1. Urban Night:
Here I only added Sephora by O.P.I 18k top coat on my ring finger.


2.  Westside Warrior:
Here I used Red Angel plate 114 and Essie Good As Gold.


3.  City Siren:
Here I used Essie Good as Gold and a fauxnad plate Called Big Plate #B.  


4.  Midtown Magic:


5.  Brownstone:
Here I used China Glaze Kalahari Kiss and fauxnad Big Plate #B. 


6. Loft-y Ambitions:
Here I used Essie's Good as Gold and fauxnad Big Plate #B


7.  CG In The City:


8.  Skyscraper:


9.  Concrete Catwalk
Stamped using China Glaze Pelican Gray and Fauxnad plate #


10.  Traffic Jam
Here I used Rimmel Black Satin and fauxnad Big Plate #B


11. Street Chic
Rimmel Black Satin and fauxnad Big Plate #B


12. Trendsetter
China Glaze and Bundle Monster Plate 215


I hope you enjoyed seeing swatches from Blast from the Past! ;)


China Glaze Magnetix II Collection 2012

Tuesday, November 13, 2012

Hola Amigos!

Today I have swatches of China Glaze Magnetix II Collection 2012.  These pretty babies are on Clearance at Sally Beauty Supply for $3.79, and if you ask if your store is having an additional 50% off you might just get a better deal like I did.   
(Colors from left to right:  Con-fused?, Get charged, Positively in love, Sparks will fly, Bond-tastic, & Gold fusion)

SWATCHES:

1.  Con-fused?


 2.  Get Charged


3.   Positively in love


4.  Sparks will fly


5.  Bond-tastic


6.   Gold Fusion


My thoughts:

I have the first collection and let me tell you these are definitely better than the first.  Plus the magnet is awesome!  New designs that I just haven't seen on other magnetic nail polishes.  Now I do think that practice does make perfect on these cause you will need some patience in making the designs with the magnet.  I recommend playing around with them counting how much time is needed to hold the magnet on each polish for the design to show up on nail.  I had to leave it alot longer on Bond-tastic and on Con-fused I just counted to 7 and the design came out beautiful.   I really enjoy magnet nail polishes.  I find them interesting and fun.

I hope you enjoy the swatches, go and check your Sally beauty Supply and pick up these babies! ;)


Nails With A View

Hola Amigos!

In this Mani we have the following beauties:  
1.  OPI Planks alot
2.  OPI Skulls & Glossbones
3.  OPI Crown Me Already
4.  Rimmel Black Satin
5.  Essie No Place Like Chrome
6.  Bundle Monster Plates 19, 201, 213 & 320


Steps:  
1.  Apply OPI Planks Alot to your thumb and middle finger .
2.  Apply OPI Skulls & Glossbones to your index finger and pinky .
3.  Appy OPI Crown Me Already to your ring finger.
4.  Let them completely dry for stamping.
5.  Now Use Rimmel Black Satin for Stamping and Bundle Monster plate 19 & 201.  Stamp the zig zag lines to your indez finger and the dots to your pinky.
6.  Use Essie No Place Like Chrome for stamping and Bundle Monster 213 & 320.  Stamping the flower to your thumb and the circles to your middle finger.
7.  Finally Apply your Top Coat!

Enjoy ;)

Blue with silver hearts

Monday, November 12, 2012

Hola amigos!


First Lets introduce you to the fabulous beauties I used in this manicure and they are:

1.  Orly Shockwave which is part of Orly Electronica Fall 2012 Collection
2.  China Glaze Some Like It Haute from the China Glaze Eye Candy 3D 2011 Holiday Collection
3.  Orly Atomic Splash from the Orly Flash Glam FX Collection
4.  Revlon 860 Metallic
5.  Nail Stamping Plate KD 3


Steps:

1.  Apply your favorite base coat.
2.  Apply Orly Shockwave to all nails except your ring finger.
3.  For your ring finger apply China Glaze Some Like It Haute.
4.  Also applied a coat of Orly Atomic Splash over China Glaze Some Like It Haute cause we love bling! :) 
5.  After applying the coats desired let it dry.  I mean completely dry.  Because you are going to stamp hearts and we don't want ruin our design.
6.  I used Revlon 860 Metallic for stamping and my nail plate KD 3.
7.  Now start stamping hearts over Orly Shockwave.
8.  Then when your finish apply your favorite Top Coat.
9.  And There you have it!  This beauty is born. 

Remember Practice makes Perfect! ;)

Bienvenidos!

Bienvenidos! Welcome!

I have been wanting to make a blog for a such a long time and finally I decided to make one.  Here I am in this strange part of the internet which I know nothing of, but want to become a part of.   I want to share my love for nail polish and nail stamping.  I have been a nail polish addict for a long time now.  I hope all goes well and that I make alot of friends along the way. ;)  You are welcome to follow me on Instagram search for swanettesnails I have alot of swatches there.

Saludos desde Puerto Rico!

 
FREE BLOGGER TEMPLATE BY DESIGNER BLOGS